
Hitting a wall
- Elliot Pavlovich
- Dec 17, 2020
- 4 min read
Updated: Jan 2, 2022
Actually, this was a part that had the least amount of problems. I added walls to make the van more homey.

Cost:
Plywood (2) - $63.96
Left over from Ceiling
Insulation
Glue
1x3 wood
Paper
Materials I already had:
Jigsaw
Extension Cord
Drill
Socket wrench
Insulation
The idea behind doing the walls was the exact same as the flooring. The only problem was that gravity was not on my side. Unlike the ceiling though that had the rafters I could use to use to support the insulation as the glue dried, I had to be a bit more creative in holding the wall insulation up. The other annoying problem I ran into was that the walls were very uneven. The floor and ceiling was uneven too, but at least with those, their ridges were regular and easy to work around. For the walls, I had to cut and add insulation at specific locations to be able to make an even face for the plywood.

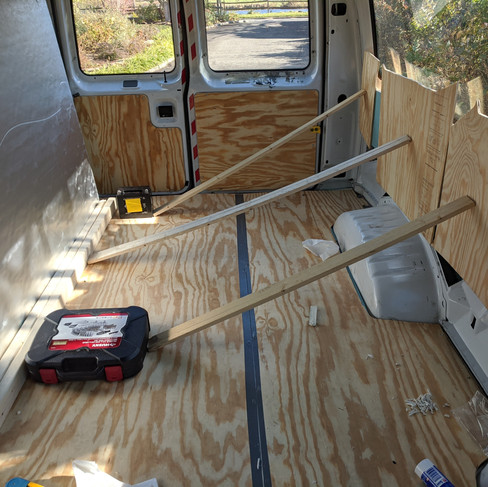


In the photo on the left, I had to use spare pieces on plywood to hold the insulation up so that there would be even pressure along all of it. Otherwise the end of the 1x3 wood would have just made an indent in the insulation.
Plywood
I attempted to use the same method for the plywood as when I did the floor. Use the large paper, make an outline, cut it out and screw it in. The idea worked in theory, but needed some adjustments in real live, especially for the wheel wells. I had to try putting the wall in and out multiple times, chopping off small bits to make it fit better.
Screwing them in was difficult too. I decided to screw the plywood directly into the metal walls instead of adding studs like I had for the floor. I could not put enough weight behind the drill to screw the screws into the metal. Even with a torque driver. I tried predrilling a smaller hole into the wall, but that did not work either. My dad had to help me for this part.


The main reason for not having studs was to keep as much space width wise for my bed as possible as well as the fact that the walls were double paned. Plus there was very little/no structural service for the walls. I did however put some shims along the floor, between the plywood floor and a small lip about an inch above it. These acted as screw points for the walls. (You can see one of these shims in the bottom right of the first photo)
I considered painting the walls, but realized that they would be hidden underneath the bed, so decided to leave them alone.
Window Wall
The biggest spot for heat leakage is the windows. However, I want the most amount of light possible. So how do I insulate the windows while still having windows? The best solution for this is removable window covers (another blog post). But I dont need all the windows, so for the biggest window that was going to be at the head of my bed I decided to make a permeant structure. I used the good, thick insulation and some plywood to morph the window into the rest of the wall.
The thumbnails show the process. First I used the contractors paper to make the outline of the window. Then I cut out the shape in insulation, stuffing it into the window to make sure it fit properly. The left over sheets of insulation I had were not big enough, so I had to tape two pieces together. I set the shaped insulation on an old sheet. This was to be the barrier between the insulation and the window, that way it would semi match the outside of the van on a quick glance. I traced it out, then cut an extra two inches around the trace so that I would have room to fold over the sheet and make a clean edge.
I used the strong spray adhesive to glue the sheet to the insulation, then pulled the spare edges over to other side and taped them down. It didn't matter how nice this side looked since it was going to be hidden by the plywood.
Next I cut out a piece of plywood that was but larger than the window. I had set up a system where I glued small pieces of wood outside the edge of the window where the plywood sheet was going to be screwed to (see pictures 6 and 7). I used the spray adhesive once more to glue the insulation to the plywood, then, since the plywood was slightly bowed, used miter saw to weigh it down and make sure it stuck to the insulation.
I sanded the side of the wood that would be showing before screwing into the little wood anchors that I made (last photo). Then I polyurethaned that large wall/headboard.


The headboard is where I had a large map of the United States that I was able to fill in the states as I visited them. It was a good reminder to show how far I had been and how much more I had to keep going.


Comments